
December 4, 2018
Introduction to Live Templates in IntelliJ IDEA
There are many ways how IntelliJ IDEA can boost your productivity by raw input speed.
Firstly, there is Code Completion which is a standard for most code editors, and offers a great deal of help. Secondly, there is Postfix Completion. Maybe this name doesn’t sound familiar to you but you are probably using it already.
Here is how a Postfix Completion for JavaScript works:
If you want to look at a few of them, in IntelliJ go to your menu and follow this route: File > Settings > Editor > General > Postfix Completion (Windows and Linux) or IntelliJ IDEA > Preferences > Editor > General > Postfix (macOS).
They are quite handy. But you can do even better! Which brings us to our third option: Live Templates!
Now, marvel at this GIF:
Its like Postfix Completion on steroids. And that is just the tip of the iceberg!

Live Templates?
There are different kinds of Live Templates:
- Simple template (some fixed code that expands into plain text)
- Parameterized template (contains plain text and variables that enable user input)
- Surround templates (work blocks of selected text)
If you want to jump ahead to the details, follow this article. But if you stick around, I can show you some basics to get you started.

The Basics
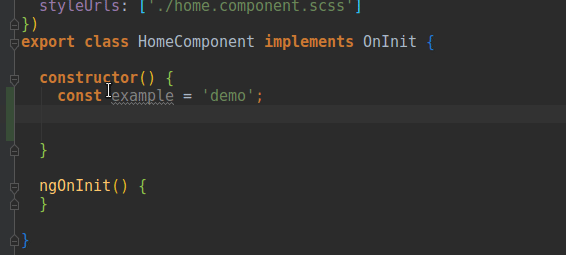
To get the same Live Template as above, open your menu and navigate to File > Settings/Preferences > Live Templates. Now search for the entry user click on the upper right corner and choose Live Template. You will get a new entry to edit. Fill in the blank spaces until they look something like this:

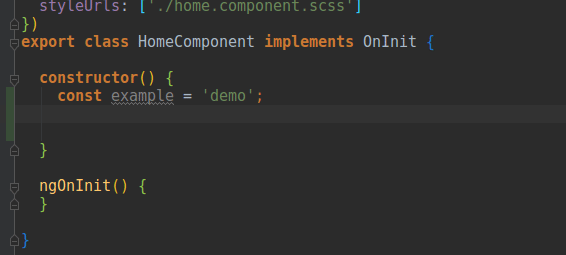
Yes, you are right. It looks somewhat similar to coding … what a pleasant surprise! Words surrounded with dollar signs are variables. And some of them are predefined. For example $END$ tells the courser where it stops after all
the template magic is done. Of course there aren’t just predefined variables, where would be the fun in that? In our case, our own variables are $VAR_COPY$ and $VAR$. Because I chose meaningful names you can already guess what they’re supposed to do. But how do we tell IntelliJ?
Look at the next image:
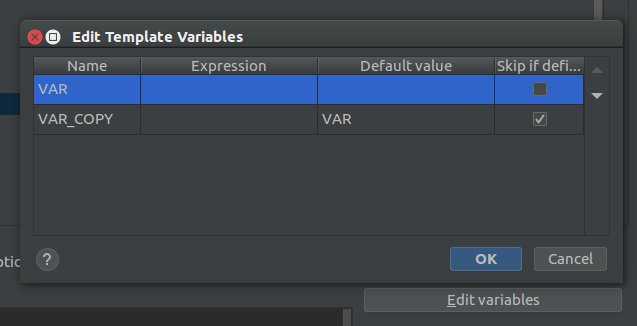
If you click on Edit variables a menu will open where you can define the secret life of each variable. These settings tell IntelliJ that there are two variables, which are named VAR and VAR_COPY. The default value of VAR_COPY is the value of VAR and if VAR_COPY has a default value, its definition will be skipped. This leaves only VAR to be defined. Therefore VARs value will be copied into
VAR_COPY.
That is pretty much all. Hit OK and Apply and start coding at maximum speed!

Live Templates!
The world (or rather IntelliJ) is your oyster. You can do all kinds of cool things with Live Templates. If an unpleasant repetitive task (e. g. writing console.log( ...) starts bothering you, try setting up a Live Template.
Further reading
- Further up I mentioned this article
- This is an official tutorial
- Check out this collection of amazing Live Templates! I think I’ll copy a few of them and tell people they were my idea
ᕦ( ͡° ͜ʖ ͡°)ᕤ

Christian Heitmann
Developer at 
Hi, I am a software engineer from Germany with a focus on frontend technologies and an affinity for everything related to UI/UX. However, my greatest challenge to date has been learning Japanese.